Server-side installation connected to a web server
A server-side installation connected to a web server is a quick way to integrate Crystal Enterprise with your existing web server—without installing the core Crystal Enterprise components on the web server itself.
First, on the machine that you have set aside for use by Crystal Enterprise, run the New installation from the Crystal Enterprise Setup program. Then, install and configure the appropriate Web Connector on your web server machine:
- If the web server is running on Windows, you can select the Web Connector by running the Custom installation from the Crystal Enterprise Setup program.
- If the web server is running on UNIX, see Installing a Web Connector on a UNIX web server.
When you perform this installation, the client and server components are installed, the default user and group accounts are created, and the sample reports are published to the system. When the installation is complete, the servers are started as services on the local machine. You will need to configure the Web Connector manually.
Note:
- If the Microsoft Data Engine (MSDE) or Microsoft SQL Server is already installed on the local machine, you must first set up an account for the CMS. For details, see Setting up the CMS database.
- You can connect your CMS directly to your preferred database server without installing the MSDE. Ensure that the MSDE or SQL Server are not installed on your local machine. Then set up the appropriate database client software or ODBC Data Source Name (DSN). Consult your local database administrator or database system documentation for details.
To install the Crystal Enterprise servers
Note: Follow these steps on the machine that you have set aside for Crystal Enterprise.
- Unless Autoplay is enabled for your CD-ROM drive, run setup.exe from the
win32 directory of your product distribution.
When you start the installation, the Microsoft Windows Installer may need to be installed or upgraded on the local machine. If so, the Wise Installation Wizard performs the necessary modifications and prompts you when finished. Click Yes to restart the machine and resume the installation automatically.
- Proceed through the Setup program's dialog boxes and follow the instructions on the screen until you reach the Directory selection dialog box:
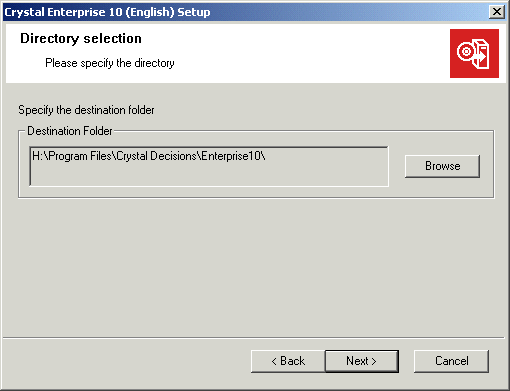
You can install the Crystal Enterprise servers on any drive on your machine. Click Next.
If you chose to install on a drive other than the default location (C:\Program Files\Crystal Decisions\Enterprise 10), the Setup program next asks you to select a drive for the installation of common files. These common files are also used by Crystal products such as Crystal Reports or Crystal Analysis.
Note: To install several Crystal products on the same machine without installing files on the default system drive, first install Crystal Enterprise. When you subsequently install Crystal Reports or Crystal Analysis, those programs will use the common file directory created by Crystal Enterprise.
- When you reach the Installation Type dialog box, click Custom; then click Next.
- In the Select Features dialog box, click the Web Server Connectors feature (under Servers) and select Entire feature will be unavailable.
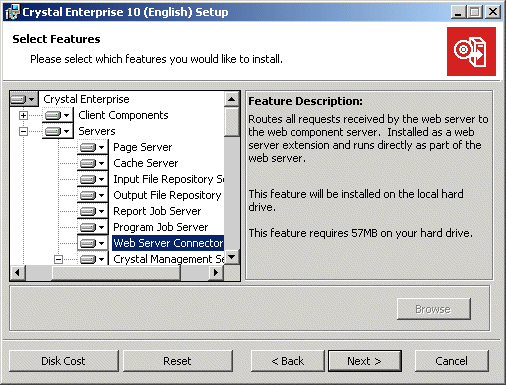
Note: The setup program checks to see whether or not the Microsoft Data Engine (MSDE) or Microsoft SQL Server is already installed on the local machine.
If not, and you don't want to install the MSDE, under the Crystal Management Server, click MSDE and select Entire feature will be unavailable.
- Click Next.
The CMS Clustering dialog box appears.
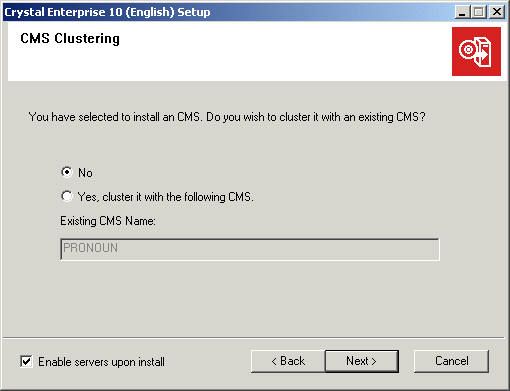
- Unless you want to cluster this new system with an existing system, select No and ensure that Enable servers upon install remains selected.
Tip: For more information on CMS clusters, see the Crystal Enterprise Administrator's Guide.
- Click Next.
- If the setup program detects the MSDE or SQL Server, use the "Microsoft SQL Server Authentication" dialog box to provide the credentials that correspond to the database account you set up for the CMS.
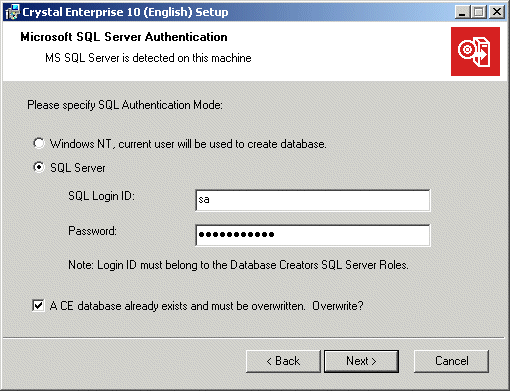
Note: If you have not yet created an account for the CMS, see Setting up the CMS database.
Select Overwrite database to overwrite any existing CMS database on this machine and proceed with the install. (If you do not select this option and the setup program detects an existing CMS database, the installation terminates. See the Crystal Enterprise Administrator's Guide for information on migrating data from a CMS database).
- If the setup program does not detect an existing MSDE or SQL Server database, it checks to see if the MSDE feature is selected for installation. If it is, use the "MSDE Security Configuration" dialog box to create a password for the default SQL administrator account that will be installed along with the MSDE.
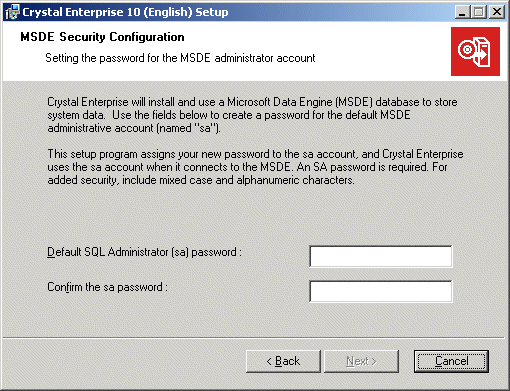
The setup program later configures the CMS to connect to its system database using this "sa" account and the password you create here.
- If the setup program does not detect an existing MSDE or SQL Server database, and the MSDE feature is not selected for installation, the "CMS Database Information" dialog box appears.
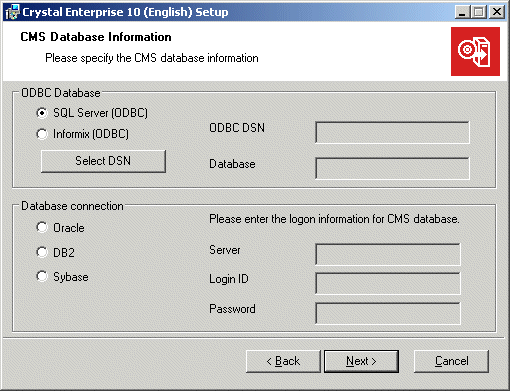
Specify the database connection type that the CMS must use to connect to the CMS database:
- If you select SQL Server or Informix, click Select DSN to choose (or create) the appropriate system data source and provide the database Login ID and password. Then click Next.
- If you select Oracle, DB2, or Sybase, enter the name of the database server, along with the database Login ID and password. Then click Next.
- When you reach the Start Installation dialog box, click Next.
The installation of files begins immediately. During the installation process, you may be prompted to restart the local machine. When the installation program has finished copying files, you are given the opportunity to register your product.
- When you reach the final setup dialog box, clear Launch Crystal Publishing Wizard.
- Click Finish.
To install the Web Connector on a Windows web server
Note: Complete these steps on your web server machine.
- Unless Autoplay is enabled for your CD-ROM drive, run setup.exe from the
win32 directory of your product distribution.
When you start the installation, the Microsoft Windows Installer may need to be installed or upgraded on the local machine. If so, the Wise Installation Wizard performs the necessary modifications and prompts you when finished. Click Yes to restart the machine and resume the installation automatically.
- Proceed through the Setup program's dialog boxes and follow the instructions displayed on your screen until you reach the Installation Type dialog box.
- Click Custom; then click Next.
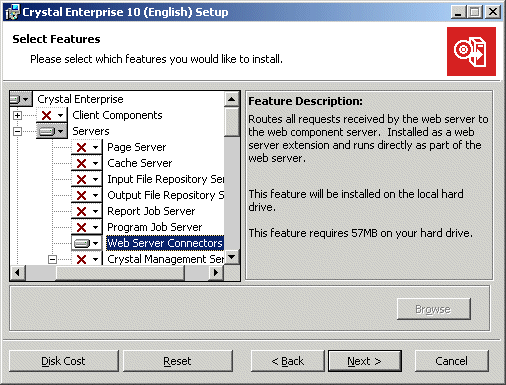
- In the Select Features dialog box, select the Web Server Connectors (under Servers) and Help Files options, and disable all of the remaining components.
- Click Next.
You are prompted to enter a Web Component Server Name.
- Type the name of the machine upon which you installed the Crystal Enterprise Web Component Server (WCS) component.
By default, the Web Connector that you are installing will forward Crystal Enterprise requests to port 6401 on the WCS machine. If you configured the WCS to listen on a different port, type your entry as machinename:portnumber
- Click Next.
- In the Start Installation dialog box, click Next.
The installation of files begins immediately. When the installation program has finished copying files, the final setup screen appears.
- Click Finish and, if prompted, restart the local machine.
If the web server installed on the local machine is a supported version of Microsoft IIS, iPlanet Enterprise Server, or Lotus Domino, then the Setup program installs and configures the appropriate Crystal Enterprise Web Connector. Thus, when the installation is complete, you can access Crystal Enterprise by opening your web browser and going to:
http://webserver/crystal/enterprise10/
Here, the term webserver represents the name of your web server machine. The Web Connector installed on that machine sets up the appropriate virtual directory mappings for the web server. The Web Connector also intercepts all Crystal Enterprise scripting requests and forwards them to the Web Component Server that you installed on your Crystal Enterprise machine. The Web Component Server evaluates the script and forwards its response to the web server through the Web Connector.
Note: For CGI web servers, you must perform additional configuration before you can access Crystal Enterprise. For details, see Configuring Web Connectors.


